Release 2 (9.2) for Windows
Part Number A95491-01
Home |
Book List |
Contents |
Index |
 Master Index |
 Feedback |
| Oracle9i Database Administrator's Guide Release 2 (9.2) for Windows Part Number A95491-01 |
|
This chapter describes how to tune the Windows NT Server operating system to ensure that your Oracle9i database is running in the best possible environment.
This chapter contains these topics:
The Windows NT Server operating system offers considerably fewer tuning adjustments than UNIX. This difference constrains systems administrators when they try to optimize Windows NT Server performance, but it also makes Windows NT Server easier to use.
There are still ways, however, to make Windows NT Server a better application server environment for Oracle9i database. Most of the operating system specific procedures described in this chapter enable Oracle9i database to reserve more system resources, such as CPU, memory, and disk I/O.
In addition, because Oracle9i database is a high-performance database management system that effectively uses resources of your Windows NT computer, it should not also serve as any of the following:
These configurations consume network, memory, and CPU resources. In addition, the Windows NT computer that is running your Oracle9i database should not be locally accessed with a high frequency or intensively used for local user processing, unless it has enough resources to accommodate all this activity.
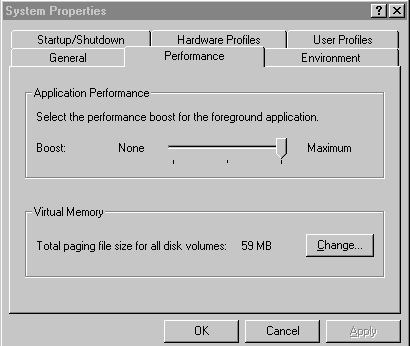
One of the settings provided by default during installation of Windows NT Server gives interactive foreground applications priority over every background process. To prevent foreground applications on the server console from taking excessive processor time away from Oracle9i database, you can reduce priority for foreground applications:
The System Properties dialog box appears.
The Performance tab displays:
Windows NT memory manager divides up system memory into three different pools described in Table 5-1.
| Pool | Percent of Total Memory |
|---|---|
|
Kernel and other system services |
9% |
|
File Cache |
41% |
|
Paged Memory |
50% |
Windows NT Server memory manager tries to balance each application's usage of memory by dynamically paging memory between physical RAM and a virtual memory paging file. If an application is particularly memory-intensive (like Oracle9i database) or if a large number of applications are running concurrently, then combined memory requirements of the applications may exceed physical memory capacity.
The large proportion of memory reserved for file caching (41%) can be quite beneficial to file and print servers. But it may not be advantageous to application servers that often run memory-intensive network applications. A Windows NT Server file cache is particularly unnecessary for Oracle9i database, which performs its own caching through System Global Area (SGA).
You can reset the Windows NT Server memory model from the default file and print server, with its large file cache, to a network applications model, with a reduced file cache and more physical memory available for Oracle9i database.
To configure Windows NT Server to be an applications server:
The Network dialog box appears.
After you have significantly reduced the file cache as described in "Configure Windows NT Server to Be an Application Server", you can retrieve additional physical memory for Oracle9i database by disabling services not needed for core operating system functionality. Unnecessary services include:
License Logging ServicePlug and PlayRemote Access Autodial ManagerRemote Access Connection ManagerRemote Access ServerTelephony ServiceConsult with your systems administrator to identify other unnecessary services.
Do not disable any of the following services:
AlerterComputer BrowserEventLogMessengerOracleServiceSIDOracleHOME_NAMETNSListenerOracleStartSID (Oracle8 release 8.0.6 and earlier)Remote Procedure Call (RPC) ServiceServerSpoolerTCP/IP NetBIOS HelperWorkstationTo disable unnecessary services:
The Services dialog box appears.
The Service dialog box appears.
Remove all unnecessary network protocols on Windows NT Server so that processing time can be concentrated on servicing only critical protocols:
The Network dialog box appears.
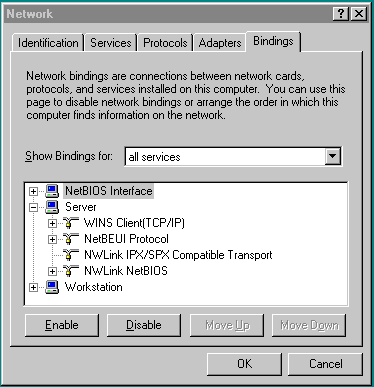
If multiple protocols must be installed on the server, you can give the protocol most frequently used by Oracle9i database highest priority by resetting the network protocol bind order:
The Network dialog box appears.
All available protocol adapters display:
Microsoft releases operating system patches, called Service Packs, on a quarterly basis. Service Packs are sometimes abbreviated as SPx where x is the release number of the Service Pack. For example, Windows NT Server 4.0 SP4 denotes a Windows NT Server 4.0 installation with Service Pack 4 applied. Service Packs are a collection of bug fixes and product enhancements to the basic Windows NT Server release. In general, apply Service Packs as soon as it is safe to do so, since they fix bugs and can improve Windows NT Server performance or functionality.
While Service Packs are supposed to fix bugs, there have been reports (for example, the initial release of Windows NT Server 4.0 SP2) of bugs within the patch updates themselves. In general, it is safest to wait a few weeks after a Service Pack is released before implementing it. This allows time for other field sites to report any problems with the SP release.
The latest Windows NT Server Service Packs may be downloaded as self-extracting archives from:
http://support.microsoft.com/support/ntserver/content/servicepacks/default.asp
To install a Service Pack:
Unless there are assurances that the Service Pack works without flaws on Windows NT Server, choose to create an Uninstall directory. This enables the Service Pack to be removed and the original configuration to be restored.
Service Pack files overwrite similarly-named files in the previous Windows NT Server configuration. However, Service Pack files can be overwritten in turn by setup programs that copy files from the original installation media.
For example, installing a new network protocol or printer driver usually requires copying files from original Windows NT Server installation media. When Service Pack files are comprehensively or selectively overwritten, the Service Pack must be re-applied.
To uninstall a Service Pack (if an Uninstall directory was created):
Compared to CPU and memory speeds, hard disk drives are extremely slow. Now that hard disk drives are relatively inexpensive, Oracle Corporation recommends that Windows NT Server use logical volumes comprised of striped physical disks. Data striping is an effective means of reducing the impact of relatively slow hard drives by distributing file I/O across a number of hard drives simultaneously.
Striping data across a number of disks is one example of a redundant array of inexpensive disks (RAID). There are several different types of RAID, also referred to as RAID levels, ranging from high performance to high reliability. The three most common RAID levels in Oracle9i database installations are RAID-0, RAID-1, and RAID-5. Descriptions of each RAID level follow Table 5-2, which shows each level's read and write penalties.
| RAID Level | Read PenaltyFoot 1 | Write PenaltyFoot 2 |
|---|---|---|
|
0 (Disk Striping) |
1:1 |
1:1 |
|
1 (Disk Mirroring |
1:1 |
2:1 |
|
0 + 1 |
1:1 |
2:1 |
|
5 (Distributed Data Gathering) |
1:1 |
4:1 |
| 1 Read penalty is ratio of I/O operations to read requests. 2 Write penalty is ratio of I/O operations to write requests. |
RAID level 0 enables high-performance, nonfault tolerant disk striping. Multiple physical hard disks are aggregated into a logical whole, either by a disk controller or through the operating system (for example, Windows NT Server stripe sets). Data operations against the logical volume are broken down into as many chunks as there are physical drives in the array, making simultaneous use of all disks. Given identical hard disks, if one hard disk has a throughput rate of DISKRATE operations/second, then a RAID 0 logical volume has a rate of:
(DISKRATE * [number of physical drives in array]) operations/second
The downside of RAID 0 is its lack of fault tolerance. If one disk in the logical volume fails, the whole volume fails and must be restored from a backup.
RAID level 1 enables fault tolerant disk mirroring with some chance of a performance penalty. Essentially, every write to a mirrored disk is duplicated on another drive dedicated to this purpose (the mirror drive). If the mirrored disk fails, the mirror drive is brought online in real time. After the faulted drive is replaced, the mirror configuration can be reestablished.
The read penalty for RAID level 1 is nominally 1:1, but it may benefit from split reads on some controllers. When the controller knows which mirror can be accessed fastest, for example, it can lower seek times by directing I/O operations to that disk.
RAID level 0+1 enables mirroring of an array of striped hard disks. This is a blend of RAID 0 and RAID 1, offering high-performing fault tolerance.
RAID level 5, also known as disk striping with parity, eliminates the costly requirement to mirror. In RAID 5, multiple hard disks are aggregated into a striped logical volume, similar to RAID 0, but each drive contains parity information such that any single drive failure is tolerated. With one failed drive, a RAID-5 system can allow continued access to data, although access times are greatly reduced due to on-the-fly rebuilding of bytes from parity information. RAID-5 solutions usually allow hot-swapping of faulty drives with replacements, triggering a rebuild of the failed drive's data onto the replacement from parity information.
The write penalty of 4:1 results from 2 reads and 2 writes during parity calculation.
This example demonstrates creation of a Windows NT Server stripe set. Suppose that there are six SCSI-2 hard disks attached to a common non-RAID disk controller. Each hard drive is not yet partitioned.
To create a Windows NT Server stripe set:
The Disk Administrator dialog box appears.
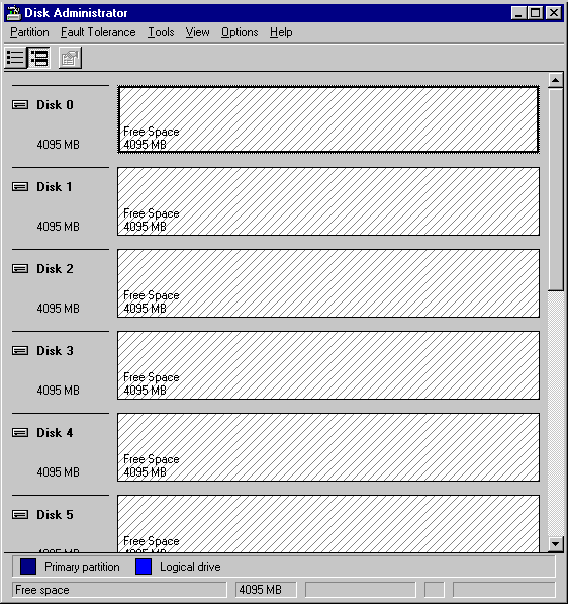
Note that the hash marks filling partitioned drive 0's free space are now in the opposite direction to marks in the free space of the unpartitioned hard disks:
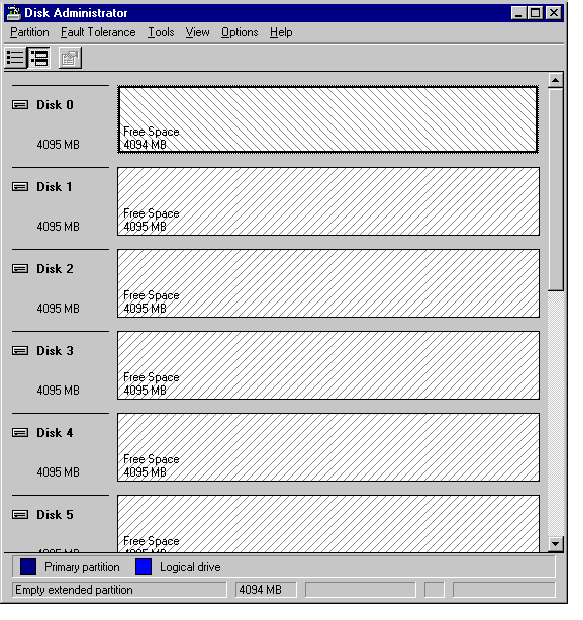
[number of hard disks] * [capacity of the smallest selected partition]
Disk Administrator automatically adjusts sizes of each drive's stripe if a stripe set size of less than the maximum allowable is chosen.
The logical stripe set volume across all physical hard disks appears.
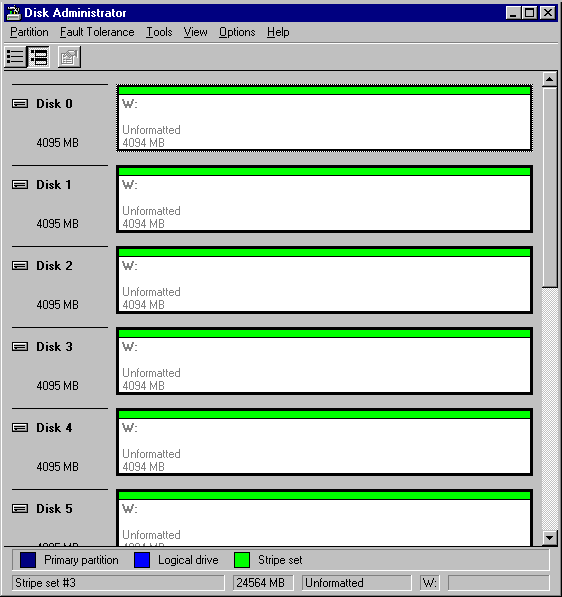
If there are enough physical disks in Windows NT Server, create at least two striped volumes (in addition to a standalone hard disk or striped volume for the operating system). One striped volume can be used for sequential data access, and the other can be used for random data access.
Oracle9i database redo logs and archived redo logs, for example, are written in sequential order. Because of reduced head movement, hard disks perform best when reading or writing sequential data.
Oracle9i database data files, however, are usually accessed in random order. Random access in a hard disk results in significant head movement, translating to slower data access.
Unless redo logs are separated from datafiles (at physical device level), undo file I/O contention may result, increasing access times for both types of files.
Some virtual memory paging is likely even if Oracle9i database is the only network application running on Windows NT Server, because Windows NT Server memory manager will attempt to move seldom-used pages to disk to free up more physical memory for hot pages.
Multiplexing the Windows NT Server virtual memory paging file is a good strategy to boost overall system performance. Splitting the paging file onto at least two different physical volumes (or logical volumes as long as underlying physical volumes do not overlap) provides a significant performance boost to virtual memory swapping operations.
Even though this is a good technique to increase speed of virtual memory paging, too much paging activity is still a performance hit and should be corrected by adding more RAM to the server.
Oracle Corporation recommends that total combined size of your page files be at least equal to physical RAM on your computer. Configurations where combined size is two to four times the size of physical RAM are not uncommon. Minimize paging as much as possible. But situations in which the operating system runs out of or low on paging space are to be avoided at all costs. Adequately-sized paging files spaced across physical disks spread out I/O most efficiently, because the operating system spreads paging evenly across page files.
Once procedures in previous sections have been applied, remember to close any unnecessary foreground applications. Three are described in this section:
Remove applications from Startup folders of Windows NT Server console operators.

Text description of the illustration startup.gif
Database administrators frequently run SQL scripts from command prompts (also known as virtual DOS machines, or VDMs). While VDMs are relatively lightweight, screen painting VDMs is expensive. When executing long-running scripts from a VDM, minimize the window so that the system can focus on the operation and not on a flood of window repaint messages.
Most entertaining screen savers quickly saturate the CPU. If a screen saver must be run, choose Blank Screen, which uses the least amount of processing time. To set a blank screen saver:
The Display Properties dialog box appears.

|
 Copyright © 1996, 2002 Oracle Corporation. All Rights Reserved. |
|