overview                        covered topics                        rendering details                        downloads


Christian's topics:

SAH-KDTree

Description: A KDTree recursively splits the objects and creates a tree-like structure with this information. During raytracing you don't have to test all of the primitives for intersection but can traverse the tree for a huge speedup. When building the tree the focus lies on how to find a good split location. In our implementation we use the surface area heuristic (SAH) to find such good locations. The implementation follows the method described in "On building fast kd-Trees for Ray Tracing, and on doing that in O(NlogN)".

Where to find in the scene: The effect of the SAH-KDTree can't be seen directly in the scene since it's used to accelerate the traversal speed of ray-tracing. Therefore we present three example scenes with different complexity to show the benefit of the tree. For each scene in the setup, we compare the times of the SAH-KDTree with the times of the standard (median split) KDTree.

Test setup:

1) our final scene: 279875 triangles, many reflections

2) the blender monkey: 908 triangles

3) the Stanford Bunny: 69451 triangles

Scene

Build Normal

Build SAH

Rendering Normal

Rendering SAH

Speedup

1)

6.875 sec

17.219 sec

69.516 sec

47.094 sec

32.3%

2)

0.016 sec

0.141 sec

0.609 sec

0.453 sec

25,6%

3)

0.063 sec

1.75 sec

3.453 sec

0.625 sec

81,9%

Where to find in source code: SAH_KDTree.hxx, SAH_KDTree.cxx


Depth of Field

Description: When looking at things in reality one can observe that only objects that lay in the focus of the eye look really sharp. All other objects are more or less blurred with respect to the disctance to the focus point. To create this effect in a raytracing we replace our simple point camera with one that owns a lens with some radius. Then many rays are shot towards the given focus point but starting at different points on the lense.

Where to find in the scene: This effect is used to create the blurring at the beginning and at the end of our animation (compare the picture on the left). Applying the effect to the whole animation wasn't possible since you need many rays per pixel to create a goodlooking effect (we used 81 rays just for the blurring). This would give a huge explosion towards rendering time.

Where to find in source code: DoFPerspectiveCamera.hxx


Tone Mapping

Description: Tone mapping transforms a picture with high dynamic range to an image with displayable range. This is necessary since normal display devices (like monitors or printers) have a strictly limited tone range. The goal of tone mapping is to maintain all details given in the high dynamic range.

Where to find in the scene: This effect can be perceived in the whole scene since we apply tone mapping to any frame of our animation. To clarify the effect we give two sample images: the upper image without tone mapping applied, the lower one with tone mapping.

Where to find in source code: image.cxx


Reflective and Refractive Transparency

Description: The reflection and refraction of light rays can be perceived almost everywhere in reality. To simulate this effect in our raytracer we split a ray everytime it hits a transparent surface. The angles of reflection and refraction are computed according to the refraction coefficients of the involved materials. The contribution of each ray is given by the fresnel term that states how much light is reflected and how much is refracted.

Where to find in the scene: This effect can be seen at many places in our scene: the table in the living-room-part, the glasses on the wood table, the windows and the glas bridge in the second floor. In the picture you can see how the transparent glas table is mirrored in the TV.

Where to find in source code: ArbitraryBRDFShader.h


Procedural Shading

Description: If you look at a wood structure in nature you won't find the same pattern twice. This is because nature doesn't care about randomness and applying limited sized textures to its objects. To achieve a comparable effect we use the "randomness" that is given by Perlin Noise. We applied this noise generation to a 3D function to create nice looking structures at any point of the scene. Furthermore we implemented the effect in such a way that it's used as an texture and can therefore be used by any shader we want.

Where to find in the scene: The effect of procedural shading can be perceived on many objects in our scene: the marble structures in the kitchen, the bath and on the stairs, the wood parquet and the stone wands. In this picture its applied to the walltiles for example.

Where to find in source code: ProceduralTexture.hxx, StoneTexture.hxx, WoodTexture.hxx


Bump Mapping

Description: Bump mapping is a technique to create uneven surfaces by manipulating the normals of the surface. So we can create complex looking models without changing the model at all. We implemented bump mapping by perturbating the shading normal of the object according to the derivatives of luminance at the shading point. As additional feature we linked bump mapping with procedural shading to create a procedural bump mapping.

Where to find in the scene: Bump mapping can be seen on any procedural shaded surface (parquet, stairs etc.) and on the tag with our names in the end of the animation. The tiles in the image are made with procedural bump mapping, resulting in a stunning glossy effect.

Where to find in source code: BumpMap.hxx


topics handled by us both:

Multithreading

Description: Nowadays many computers are armed with multicore processors. To make advantage of this infrastructure we implemented multicore support for our raytracer. As we want this benefit for both systems, Windows and Linux, we decided to use the solution given by the OpenMP-Package (www.openmp.org).

Where to find in the scene: As with SAH-KDTree this feature cannot be perceived in the scene but gives huge benefit to raytracing times. So we give example scenes and times as before.

Test setup:

1) our final scene: 279875 triangles, many reflections

2) the blender monkey: 908 triangles

3) the Stanford Bunny: 69451 triangles

Scene

without MT

with MT (2 cores)

Speedup

1)

93.953 sec

47.094 sec

49.8%

2)

0.701 sec

0.453 sec

35,4%

3)

0.995 sec

0.625 sec

37,2%

Annotation: the writing of the image (which is not multithreaded) is involved in the measurement.

Where to find in source code: SAH_KDTree.cxx, RayTracer.cxx


Daniel's topics:

Photon Mapping with Final Gathering

Description:
With photon mapping it is possible to create a good looking indirect illumination. This is achieved by shooting photons from the light sources into the scene. When hitting an object, the photon is either refracted, diffuse reflected or specular reflected. This is determined by the material properties. To calculate the photon density at a given point, a k-nearest-neighbour search is performed, and the collected photon energy is divided by the search radius. To minimize variation in the estimate, all photon have the same energy. To speed up the photon mapping, the density is cached in every photon.

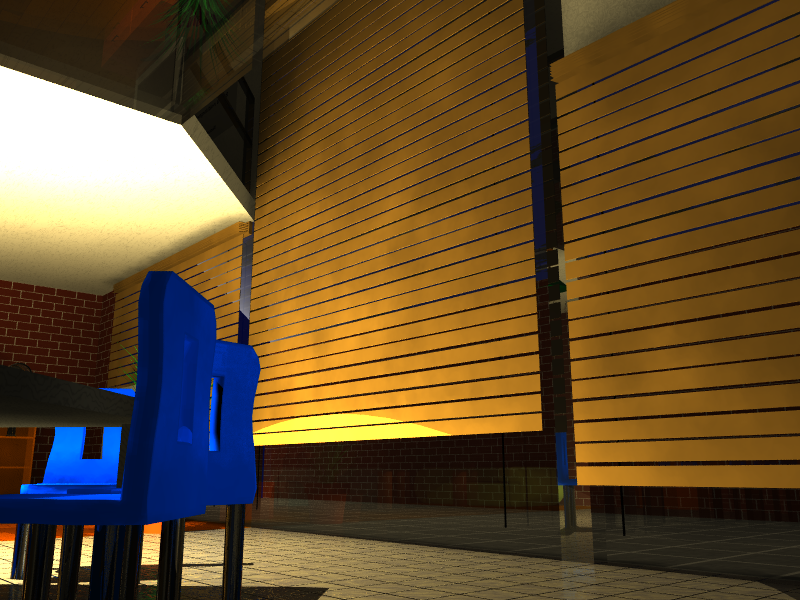
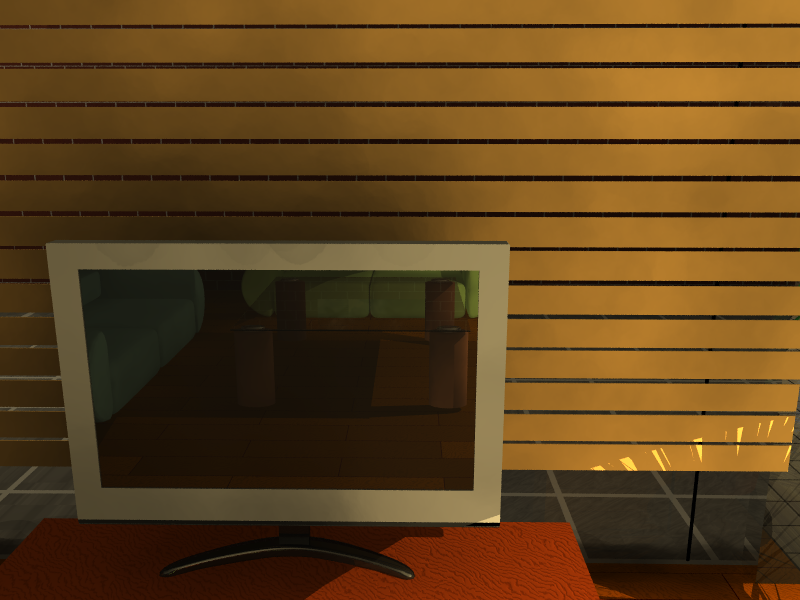
We don't have visualized the photon mapping results directly. Instead we have used final gathering to collect the indirect and direct illumination. So we avoid estimation errors for example at boundaries, for that photon mapping is known for. For the final gathering we select an evenly distributed set of photon positions (in our final rendering 1/10th of the photons are selected).

Then we smooth over a small set of nearest neighbours using an average mean over the quadratic distances to the query point. First, we store smoothed results of the final gather points into the photon map points, and then during rendering, we smooth again over a few nearest neighbours of the photon map. Usually the smoothing is better using more nearest neighbours, 
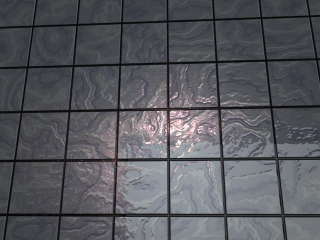
but it can also come to undesired light leaking. Two different smoothing settings can be seen on the left.

For optimizing the performance furthermore, we seperated the kd-tree node informations (position, splitplane) from the data (surface normal, cached final gather irradiance, etc.) so that there is less memory access during kd-tree traversal. This brought us a speed gain of about 50%.
We also implemented load- and save functionality which was a must have, since rendering the whole video at once was not feasible, and we have distributed the rendering among many pc's.

Where to find in the scene: 
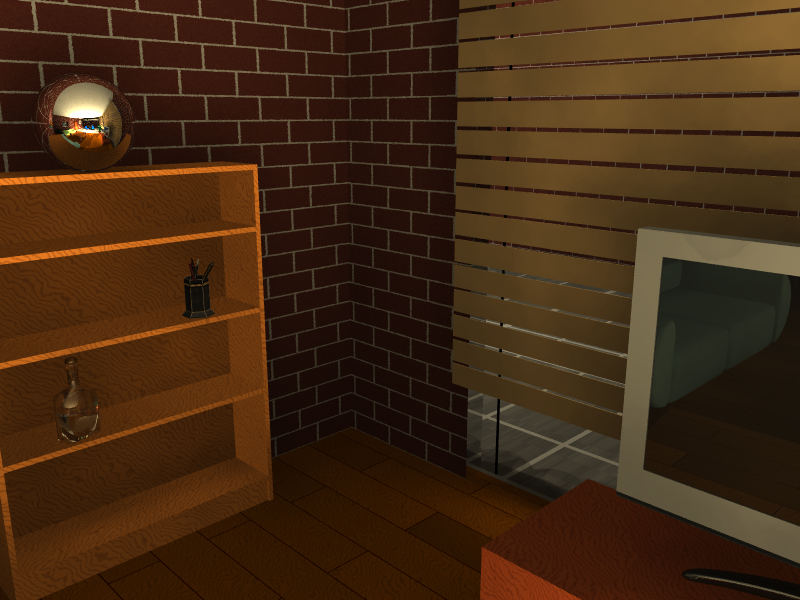
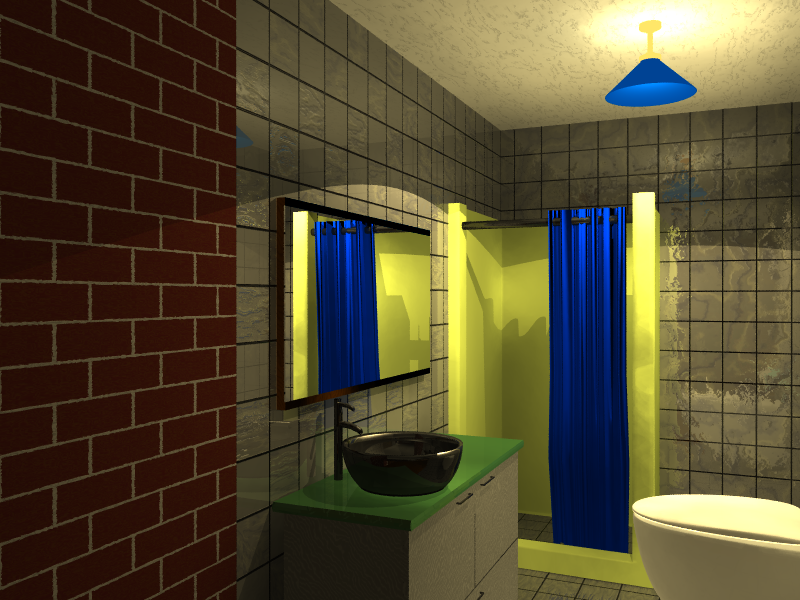
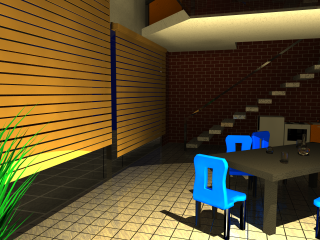
Basically everywhere and huge parts of the scene are solely illuminated by the final gather photon map.

Where to find in source code: PhotonMap.h, PhotonMap.cxx, PhotonMap_KDTree.cxx, PhotonTracer.h, PhotonTracer.cxx


Reflection Mapping

Description: We sent the rays from the middle point of the object into all spherical directions and stored the result as an image on the surface of a surrounding sphere. When a ray hits the object, the reflection ray intersects the surrounding sphere and gets its color from the image. This is computed in O(1) since there is no need to intersect the scene anymore. This is especially helpfull in animations with a static world.

Where to find in the scene: On the sphere in image to the right.

Where to find in source code: ReflectionMap.h, ReflectionMap.cxx


Physically-Based Surface Models

Description:
We have implemented the specular Cook-Torrance microfacet model. Microfacets are very tiny perfectly specular reflectors, and the normals are distributed along the object normal. The roughness determines how much the microfacet normals differ from the surface normal. The model also computes self shadowing of microfacets and how each microfacet reflects light.

Where to find in the scene: We have applied the Cook-Torrance model on many objects, it can be best seen on the wash vase in the bath room.

Where to find in source code: CookTorranceBRDF.h


Shadow Cache

Description: Since we have few direct illumination, it seems natural to speed up the shadow calculation. We have achieved this by storing the the last hit primitive and object for every pixel and bounce depth (since we have many bounces) for every light source.

During shadow calculation we first query if there is an intersection (lightsource -> hitpoint) with the stored primitive and if not, we check the intersection with the stored object before doing a regular intersection test in the scene.

When rendering only with direct illumination (for example in the kitchen), the shadow cache brought us an performance speedup of about 50%.

Where to find in source code: ShadowCache.h, ShadowCache.cxx